

树莓派打造ALL IN ONE(4):Docker安装Homeassistant智能家居系统
经过上篇文章的操作,我们已经安装了Docker和Docker的可视化管理工具Portainer,至此所有的准备工作都做完了,可以开始愉快的玩Docker了,本节就开始通过Docker安装Homeassistant智能家居系统,一起来熟悉使用一下Docker。
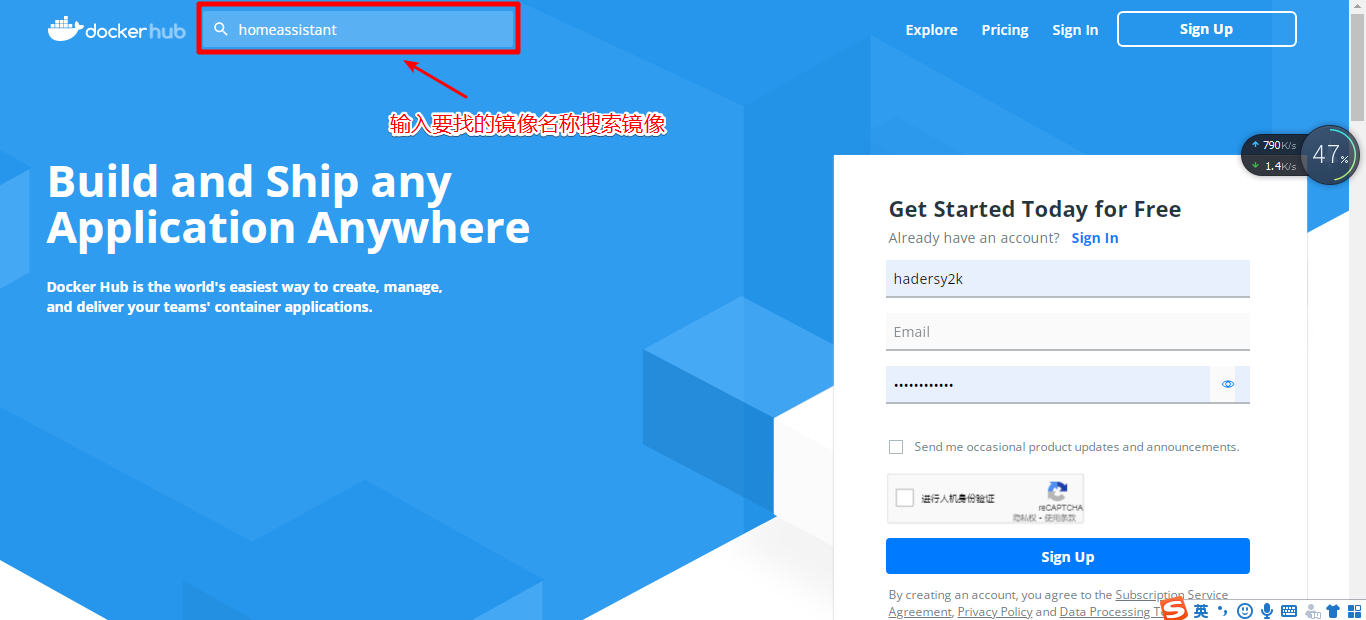
Step1:打开网址https://hub.docker.com/,这是Docker的官方镜像仓库Docker hub
Step2:如下图输入并搜索我们需要的镜像
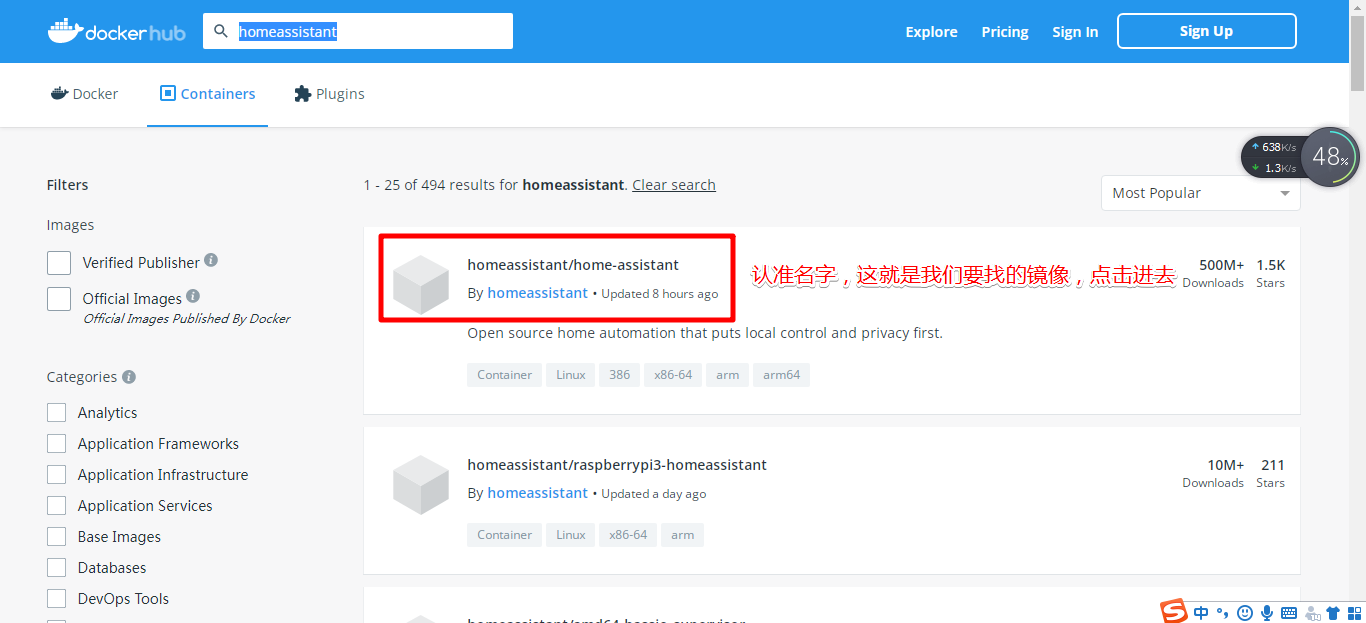
Step3:选择正确的镜像
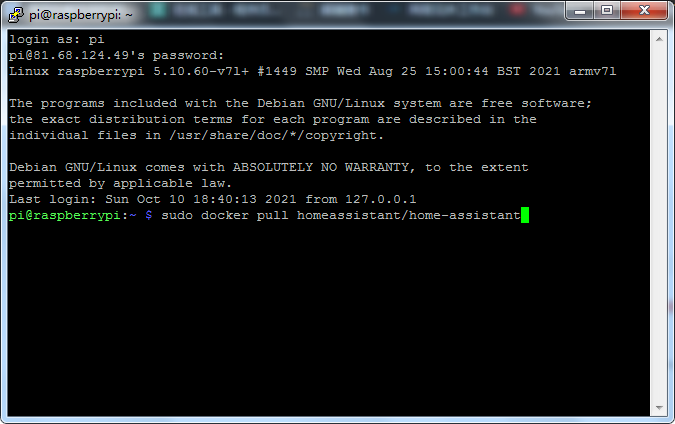
Step4:拉取镜像到本地
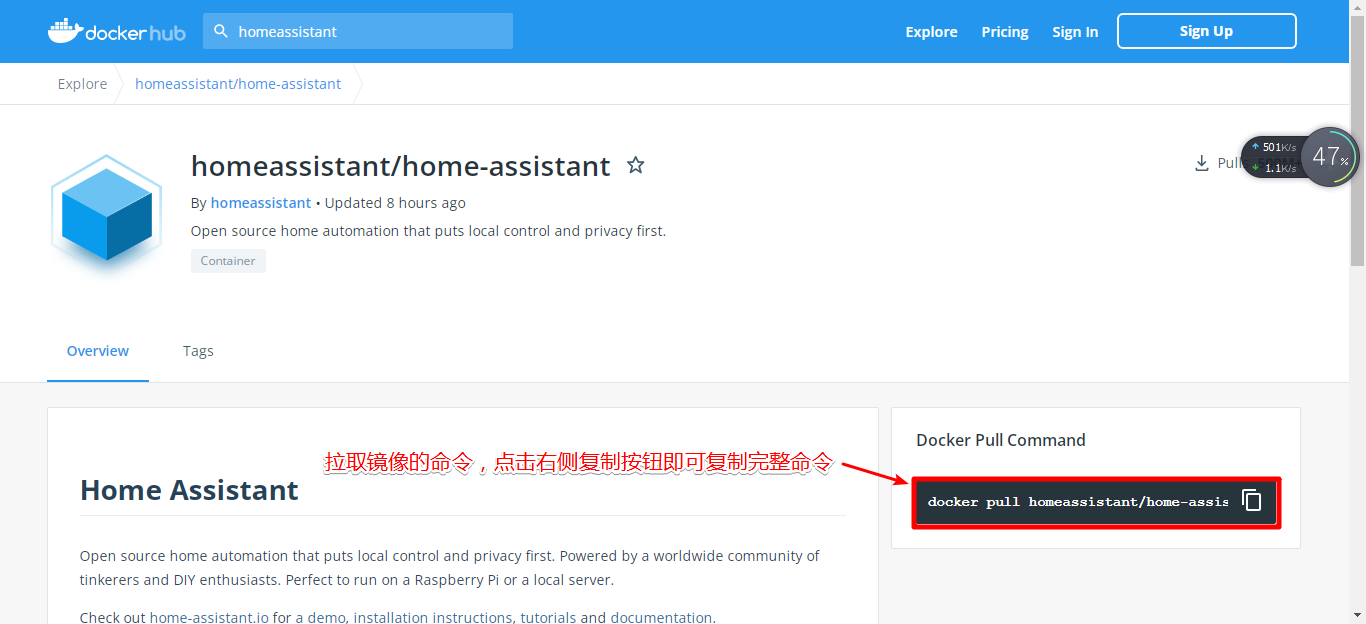
通过SSH登录或者连接屏幕进入命令行,执行刚刚复制的命令,即可拉取镜像到本地,亦可通过Portainer可视化工具拉取,不讲了比较简单。
等待镜像拉取完成,开始配置部署容器。
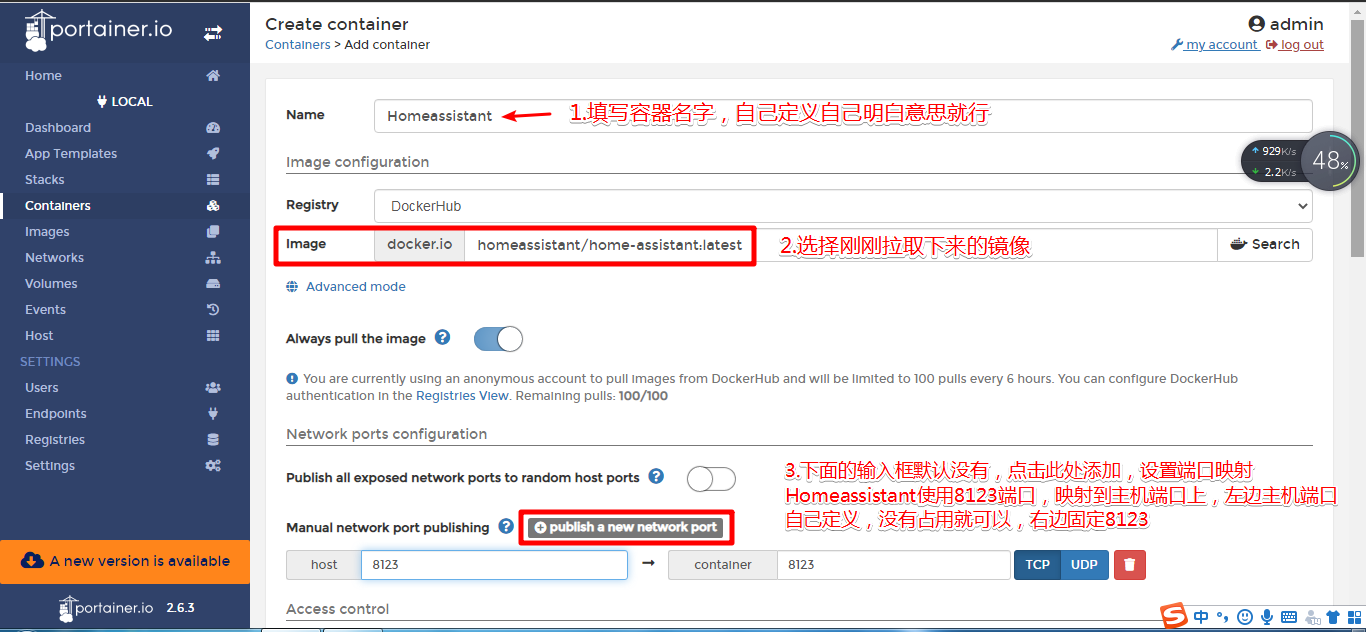
Step5:部署运行容器
首先打开Portainer可视化工具管理页面
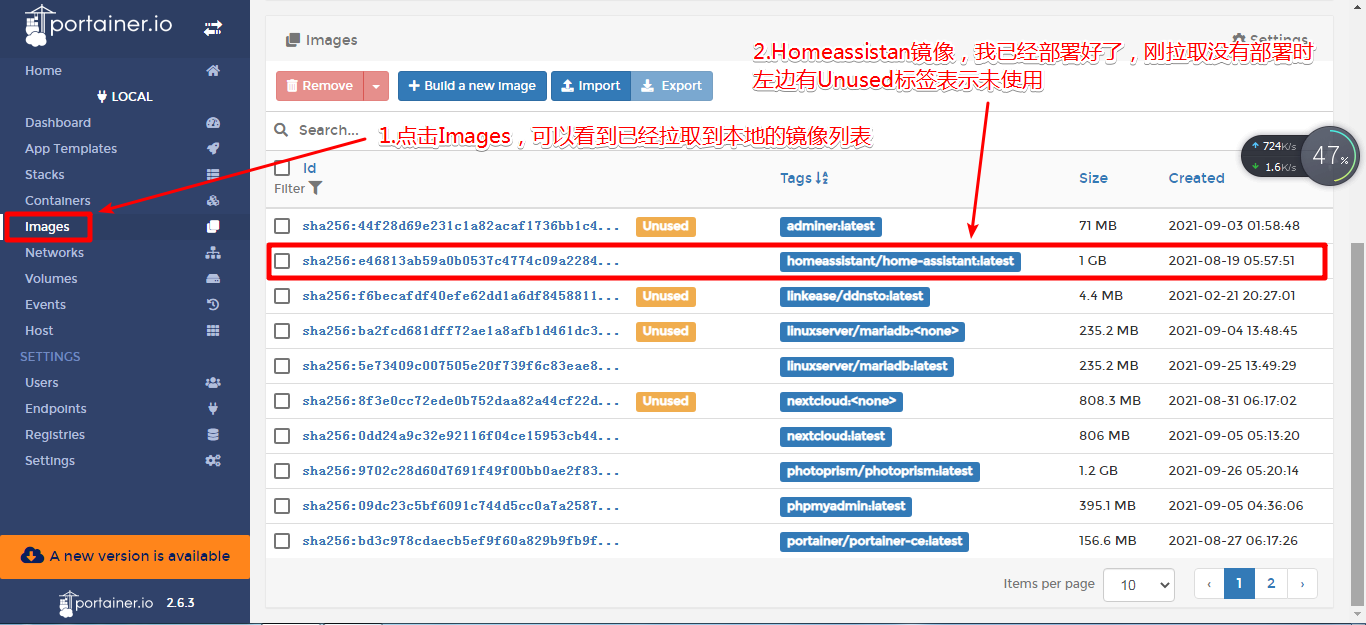
在镜像列表里看到homeassistant的镜像,说明镜像已经成功的拉取到本地了,下一步就开始部署容器。
接下来配置存储路径映射

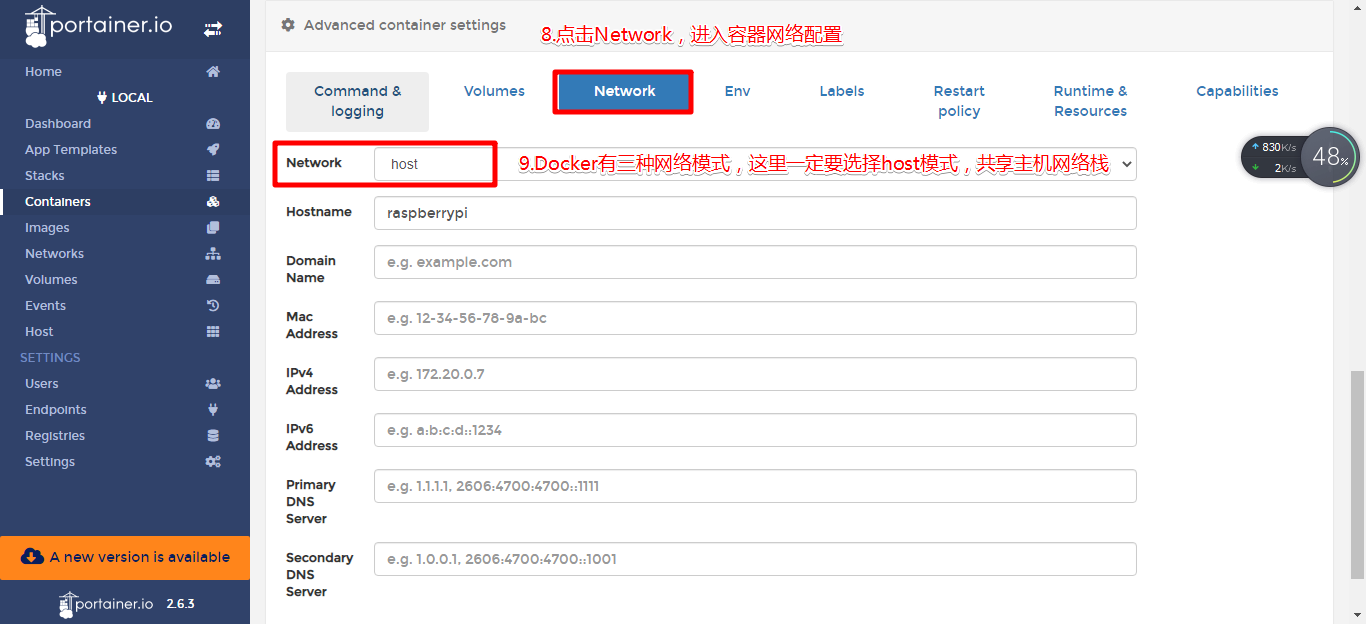
配置网络:
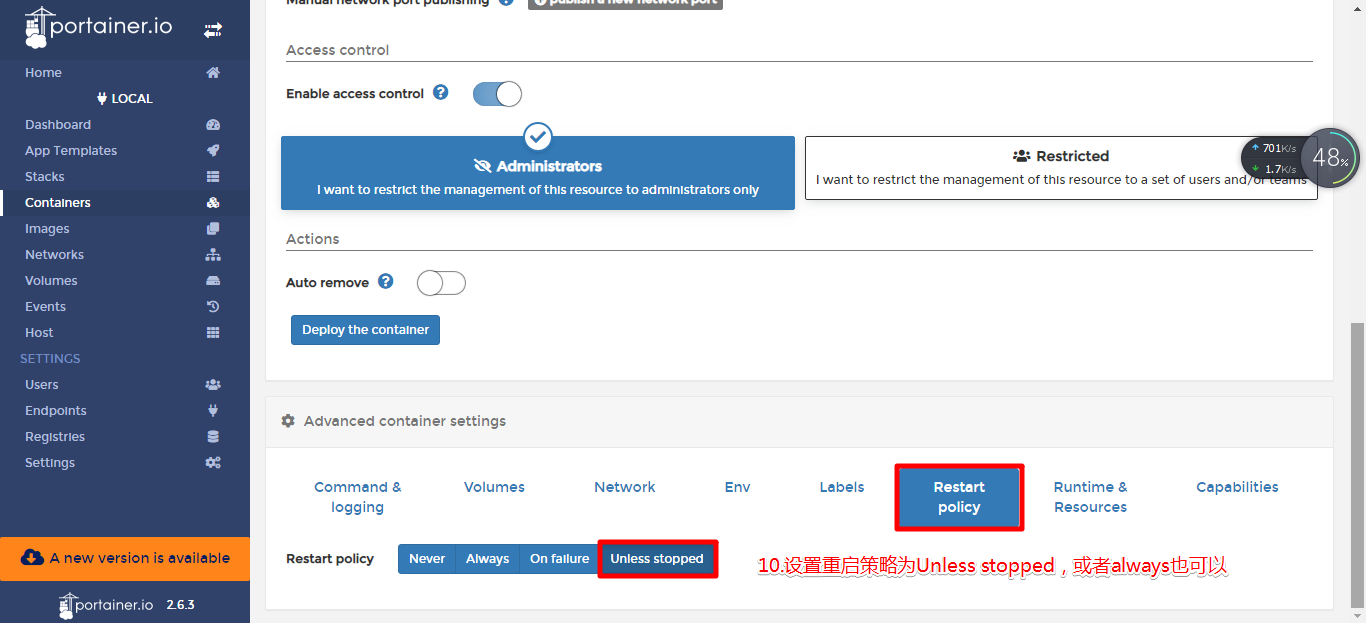
配置重启策略
开启特权模式

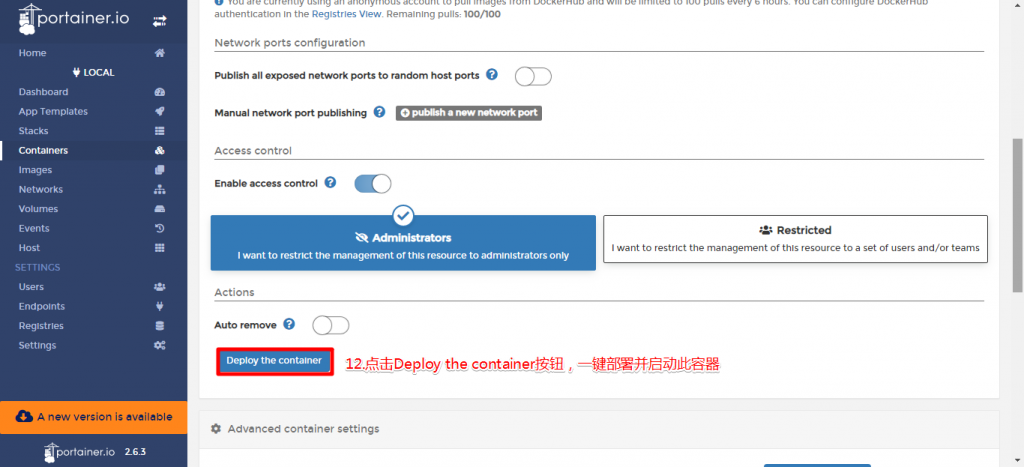
至此,所有配置结束,对了写到这才想起来(配置网络为host模式的情况下,前面8123端口的映射就不用设置了,默认也使用主机的8123端口,配置也没关系,开了host网络模式之后会自动去掉哈哈),至此我们可以部署启动此容器。
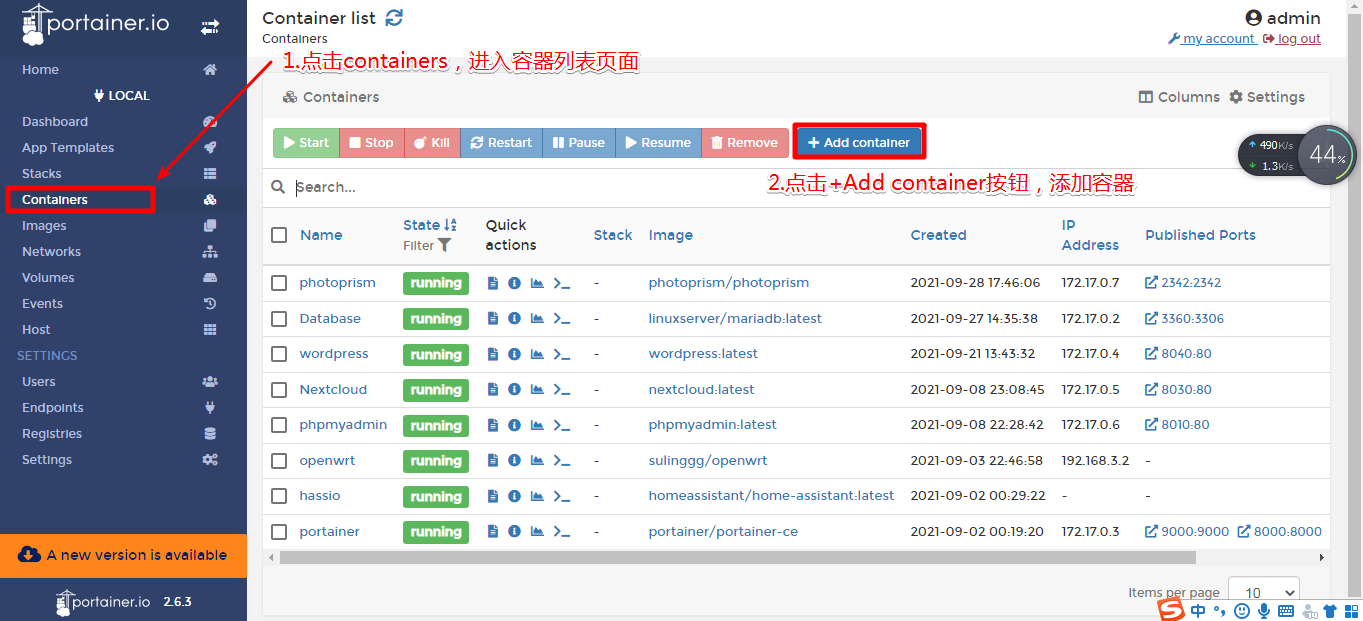
回到Container列表,可以看到是否部署成功
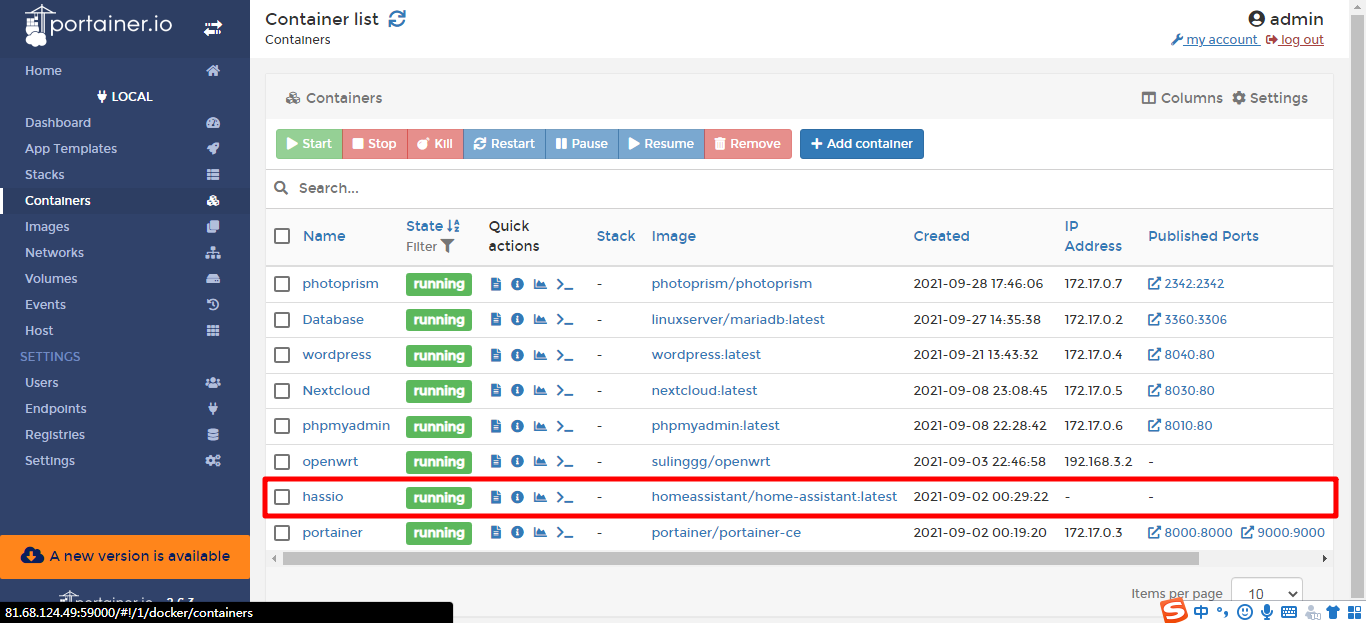
看到状态是running,代表部署成功,接下来可以尝试访问一下homeassistant系统。
浏览器输入树莓派的IP地址:8123,访问树莓派的8123端口。
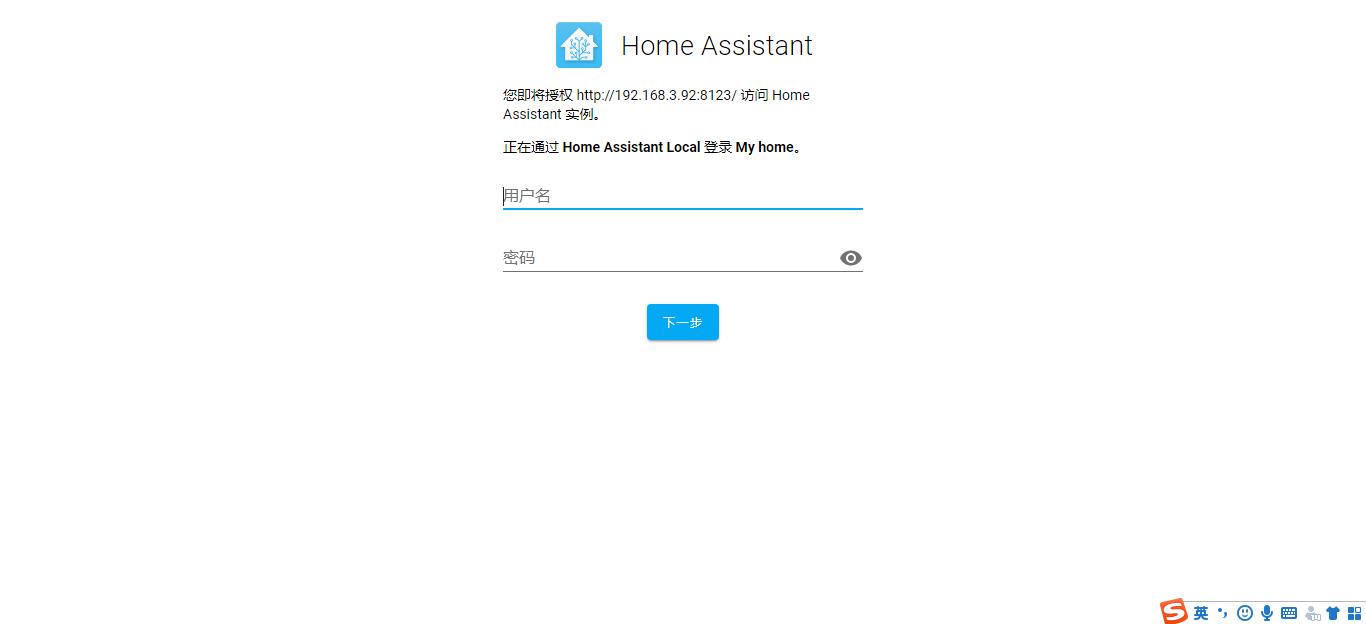
成功进入Homeassistant的管理页面,第一次进入会让你设置用户名密码。至此Homeassistant部署成功,具体的Homeassistant系统玩法我会另开一个系列文章分享(咕咕咕),拜拜
请问大佬,可以装软路由系统吗?比如openwrt
补充说明:是在当前安装的OMV系统安装软路由系统
可以在docker中安装OpenWrt
但是OpenWrt要使用Macvlan网络且父设备只能支持有线网卡,要插网线使用